OWL官方示例下载
在开始练习之前,我们首先需要从下载官方的案例,之后跟着官方的文档一步步实现相应的功能。

实现一个Counter组件
我们访问 http://localhost:8069/awesome_owl(localhost:8069是指你当前应用设置的域名和端口),此时页面应仅有一串hello world字符。
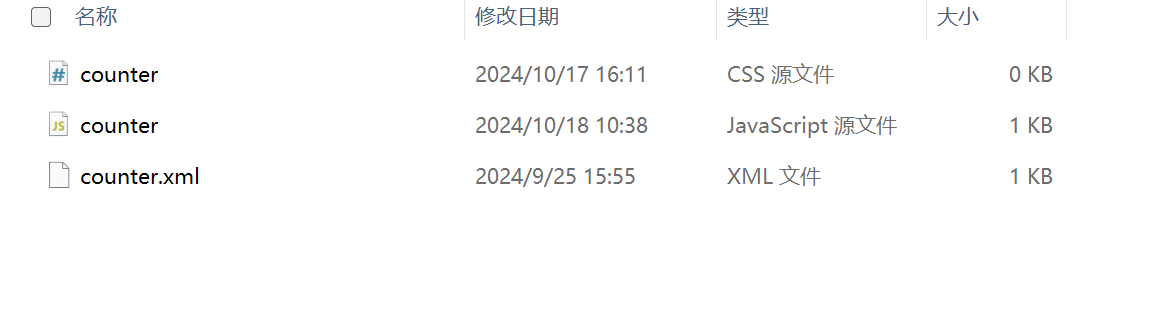
我们回到当前模块 static/src目录下新建文件夹 Counter,并创建对应的js和xml文件
填写案例代码:
counter.js
/** @odoo-module **/

import { Component, useState } from "@odoo/owl";

export class Counter extends Component {
    static template = "my_module.Counter";

    setup() {
        this.state = useState({ value: 0 });
    }

    increment() {
        this.state.value++;
    }
}
counter.xml
<templates xml:space="preserve">
   <t t-name="my_module.Counter">
      <p>Counter: <t t-esc="state.value"/></p>
      <button class="btn btn-primary" t-on-click="increment">Increment</button>
   </t>
</templates>
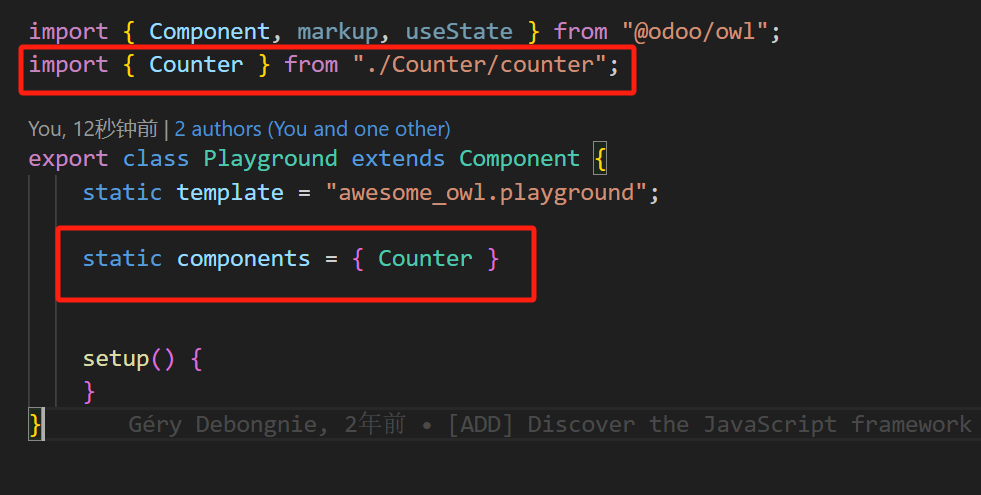
在
playground.js中将写好的组件注册并使用
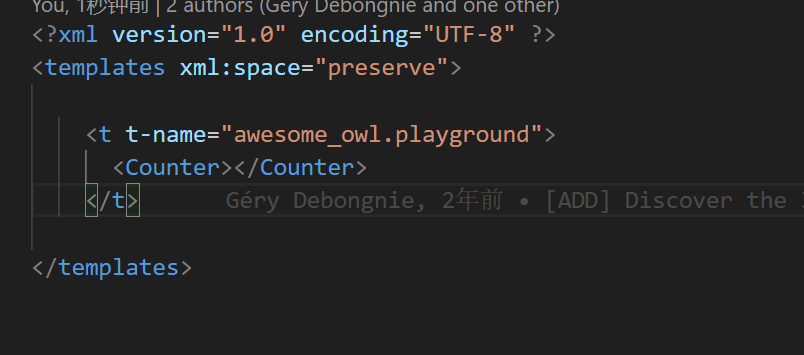
内容展示:

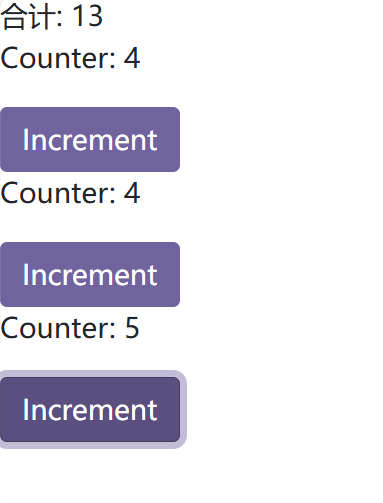
计算总和
接下来我们将实现一个功能,将多个计数器的值相加计算总和。
这时候我们需要对原有的结构进行一些改造,将总和存在父组件,通过传入方法,在每次新增数据之后我们对总和进行计算。
Counter将接收一个方法,在每次新增时候调用该方法。
/** @odoo-module **/
import { Component, useState } from "@odoo/owl";
export class Counter extends Component {
static template = "my_module.Counter";
static props = {
onChange: {
type: Function
}
}
setup() {
this.state = useState({ value: 0 });
}
increment() {
this.state.value++;
this.props.onChange(1)
}
}随后在playground.js定义总和和方法


回到页面上
OWL实践